


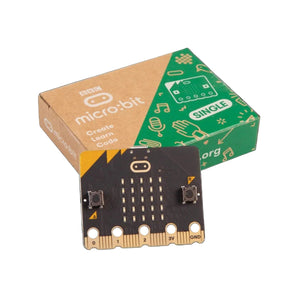
Meet the micro:bit. Computing made physical.
The BBC micro:bit is an award-winning programmable device that allows students to get hands-on with coding and digital making.


Easy. Effective. Engaging.
What is the micro:bit?
The BBC micro:bit is a pocket-sized computer designed to make coding and programming accessible and fun for everyone, especially children.
- Gather data for mathematics and science
- Make learning playful
- Bring digital coding to lift
- Interact with dozens of input/output features
- Build on learning with hundreds of accessories
Shop micro:bits

 micro:bit Single Board $17.99 USD /
 micro:bit Go Pack $19.99 USD /
 micro:bit Club Pack $189.90 USD /


 micro:bit Battery Box $1.90 USD /
 CHARGE Rechargeable Battery Pack for micro:bit From $6.00 USD /


micro:bit Features

Discover all the ways to use micro:bit

Elementary School
The micro:bit provides a tangible way for early learners to interact with their code programs and understand coding logic.

Middle School
In middle school, the micro:bit allows students to build on their coding knowledge, creating more advanced programs using the device's various input/output functions.

High School
In high school, students can take advantage of the micro:bit's more advanced coding languages like JavaScript and Python to build their coding capacity and programming skills.

Math
In math class, students can code simulated playing dice to learn about probability, or use the data logger to graph environmental or movement data.

Computer Science
micro:bit's low floor, high ceiling, and wide walls functionality makes it one of the best tangible tools for not only introducing learners to Computer Science, but also empowering them to learn advanced, text-based coding languages.

Science
The micro:bit is equipped with a series of environmental input sensors, like temperature, sound, accelerometer, a compass and more - making it the perfect tool for science experiments and environmental exploration!

Artificial Intelligence
Using the accelerometer on the micro:bit and the CreateAI program you can train a machine learning model on your own movement data.


Professional Development
micro:bit Training Resources
If you're new to micro:bit or coding with Makecode, the Forward Education Educator Courses can help guide you through getting started with micro:bit.
Interested in LIVE Professional Development?
Forward Education offers live, virtual professional development training for groups of educators!


Introduction to Coding with micro:bit PD Session
Join us for this immersive, 90-minute workshop designed to empower educators to confidently introduce their students to coding & physical computing using the micro:bit.
What the session covers:
🔍 Exploring the micro:bit: Explore the micro:bit's capabilities, understand input and output, and get hands-on with the MakeCode editor through engaging coding challenges.
📚 Code Your First Project: Design an algorithm and code a working step counter project, mastering core coding concepts like loops, conditionals, and variables.
🔧 Resources and Next Steps: Discover supportive classroom resources and learn how Forward Education can take your physical computing journey to the next level with products like our Climate Action Kit and CHARGE.
micro:bit Compatible Products
micro:bit acts as the 'brain' in many coding & robotics products and projects. Check out some of the many micro:bit compatible accessories.


micro:bit FAQs
Missing something? Please contact our team with any additional questions or inquiries.
What is a micro:bit?
The BBC micro:bit is a pocket-sized, programmable computer designed to teach students about coding, electronics, and digital creativity. It’s ideal for use in classrooms and at home.
What can I do with a micro:bit?
You can build games, create digital sensors, make music, control motors, and even develop wearable tech. It's perfect for hands-on STEAM and robotics projects.
What is the difference between micro:bit V1 and V2?
The micro:bit V2 includes additional features like a built-in speaker, microphone, and improved processor. It’s more powerful and offers a wider range of project possibilities.
Do I need any accessories to use the micro:bit?
The micro:bit requires a USB cable and power source to get started.
If you're interested in using a rechargeable power source for your micro:bit, check our the CHARGE for micro:bit.
Many projects also use expansion boards, sensors, motors, or all-in-one kits to extend functionality.
Is the micro:bit suitable for classroom use?
Absolutely. The micro:bit is widely used in schools around the world to teach coding, robotics, and engineering. Forward Education offers micro:bit classroom kits and curriculum resources designed specifically for teachers.
Can I use the micro:bit with other coding platforms?
Yes! The micro:bit supports Microsoft MakeCode, Python, and JavaScript. You can code online and easily download programs to your device.


